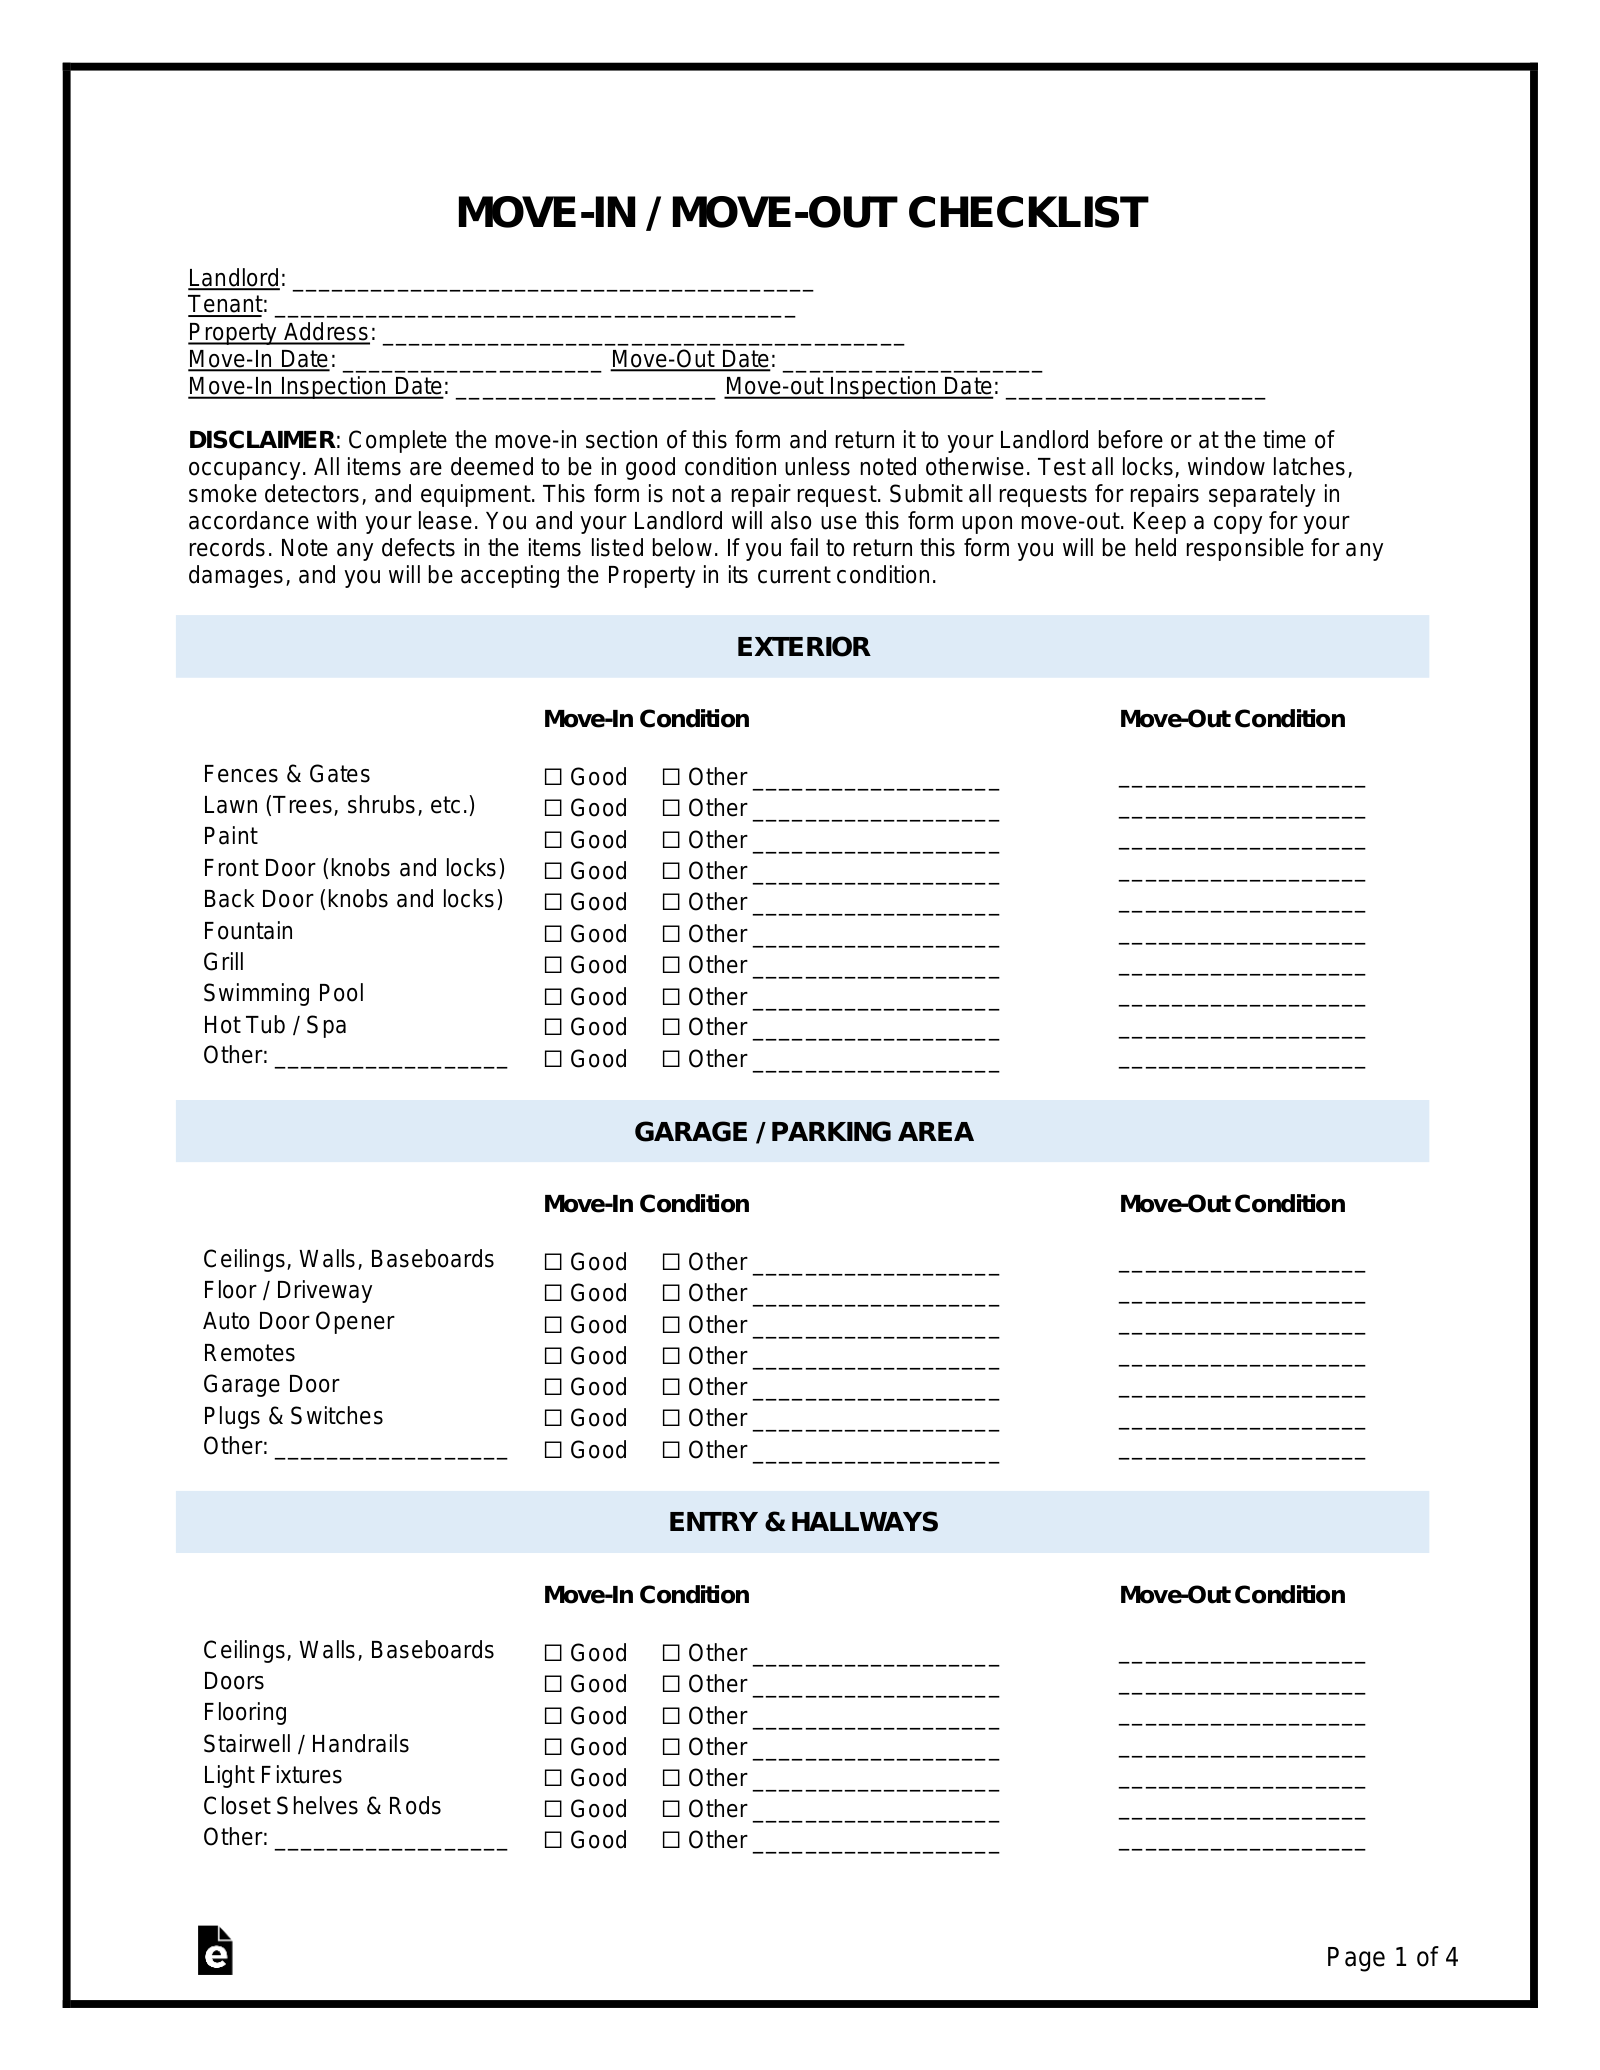
Moving out of a rental property often feels like a giant puzzle with too many pieces. You have to pack your life into boxes, coordinate with movers, and somehow find the time to leave the place looking as good as it did when you first arrived. This is where having a reliable tenant move out checklist template becomes your best friend. It acts as a roadmap to ensure you do not miss those tiny details that could potentially cost you a chunk of your security deposit. By following a structured guide, you can tackle the cleaning and repairs process with confidence rather than chaos.
The transition from one home to another is inherently stressful, but the financial aspect of moving is what keeps most people up at night. Getting your security deposit back in full is usually the goal for any departing resident. Landlords and property managers look for specific signs of wear and tear versus actual damage. When you have a clear list of expectations, you can address the issues that matter most to the person inspecting the property. This clarity helps prevent misunderstandings and keeps the relationship professional until the very end.
Setting expectations early on is the key to a smooth departure. Whether you have lived in a space for six months or six years, dust and grime have a way of hiding in corners you never even thought to look at. A good approach is to treat the move-out process like a professional service project. Instead of looking at the whole apartment at once, you should break it down into manageable chunks. This way, you can celebrate small victories as you clear out each room, making the monumental task of moving feel a lot more achievable.
The Nitty Gritty of Deep Cleaning Your Rental
The first rule of a successful move-out is to clean from the top down. This means you should start by dusting ceiling fans, light fixtures, and the tops of door frames. If you clean the floors first, all that dust from the ceiling will just fall back down and ruin your hard work. It sounds simple, but you would be surprised how many people forget to look up. Gravity is your ally if you plan your cleaning route correctly, so always start with the highest points in every room and work your way toward the baseboards.
Focusing on the Kitchen and Living Areas
Kitchens are often the most scrutinized rooms during an inspection. Grease has a way of coating surfaces that you do not touch daily, like the top of the refrigerator or the inside of the oven. You should spend extra time degreasing the stovetop and ensuring the vent hood filter is clean. If your rental came with appliances, make sure the inside of the dishwasher and the microwave are spotless. A clean kitchen sends a strong message to the landlord that you have taken excellent care of the property throughout your tenancy.
In the living areas, focus on the walls and floors. If you hung up pictures or shelves, you might need to patch small nail holes with a bit of spackle. It is also a good idea to wipe down the walls to remove any scuff marks or fingerprints. If the property has carpets, consider getting them professionally cleaned or renting a steam cleaner. High traffic areas can look worn out, but a good deep clean can often restore the carpet to a condition that meets the standards of your initial walk-through.
Sanitizing Bathrooms and Bedrooms
Bathrooms require a level of sanitization that goes beyond a quick wipe. Scrub the grout in the shower, polish the chrome fixtures until they shine, and make sure the medicine cabinet is empty and clean. Don’t forget the exhaust fan, as these often accumulate a thick layer of dust over time. Mirrors should be streak-free, and the toilet should be cleaned inside and out, including the base where dust often settles. A sparkling bathroom shows that you have maintained a high level of hygiene during your stay.
Bedrooms might seem easy because they are usually just boxes, but closets and windows need attention. Empty all the shelving and wipe away any dust or cobwebs that have formed in the corners of the closet. For windows, clean both the glass and the sills. If there are blinds or curtains included with the unit, make sure they are free of dust and functioning properly. These small touches contribute significantly to the overall impression the property makes during the final walk-through with the landlord.
Finally, do not forget the exterior areas if you have a balcony, patio, or yard. Sweep away leaves, remove any trash, and ensure that any outdoor lighting is still working. If you were responsible for lawn care, make sure the grass is freshly cut and the weeds are pulled. The exterior is the first thing a landlord sees, and a tidy outdoor space sets a positive tone before they even step through the front door. Once you have finished every room, take a moment to walk through one last time to ensure nothing was missed.
Managing Your Transition and Documentation
Beyond the physical cleaning, there are several administrative tasks that you must handle to ensure a clean break from your old rental. Using your tenant move out checklist template to keep track of these tasks is just as important as the cleaning itself. You need to make sure that all your accounts are settled and that the landlord has a way to reach you once you have left. This phase of the process is all about logistics and ensuring that no loose ends are left dangling as you move into your next home.
Documentation is your best defense in case of a dispute over the security deposit. Even if you have a great relationship with your landlord, it is vital to have photographic evidence of the condition you left the property in. Take photos of the insides of appliances, the condition of the flooring, and the state of the walls. If there was pre-existing damage that you noted when you moved in, make sure you have those records handy as well. Having a digital trail of the move-out process provides peace of mind and professional protection for both parties involved.
Communication is the final piece of the puzzle. Let your landlord know exactly when you will be fully moved out and when they can expect the keys. Provide them with your new forwarding address in writing so they know where to send your deposit check or any necessary correspondence. Being proactive and organized during these final days makes the entire experience less emotional and more like a simple business transaction. When you handle the exit with grace and thoroughness, you leave behind a positive reputation as a tenant.
As you stand in your empty apartment for the last time, you should feel a sense of pride in the work you have done. Moving is a massive undertaking, and successfully navigating the move-out process is a major accomplishment. By taking the time to clean deeply and document everything, you have done your part to ensure a smooth transition. Now, you can turn your focus entirely toward your new space and the fresh start that awaits you there.
The effort you put into following a structured plan pays off the moment you receive that deposit back in your bank account. It is not just about the money, though that certainly helps with the costs of a new home; it is about the closure of one chapter and the beginning of another. Take a deep breath and look forward to the memories you will build in your next residence. You have handled this move like a pro, and you are ready for whatever comes next in your journey.


