Keeping an ice machine sparkling clean might not be the most exciting part of your day, but it is absolutely crucial for any business that relies on ice. Think about it: whether you are running a bustling restaurant, a cozy cafe, a busy hospital, or even just have a machine in your office break room, the quality of your ice directly reflects on your establishment. Unseen issues like bacteria, mold, and scale can quickly turn fresh ice into a health hazard, compromising both your reputation and customer well-being.
That is why a systematic approach to cleaning is not just a good idea, it is essential. You want to make sure every nook and cranny is addressed, that cleaning solutions are used correctly, and that nothing is overlooked. A structured guide can take the guesswork out of the process, ensuring consistent results every time. This is where a reliable ice machine cleaning checklist template becomes your best friend, transforming a potentially daunting task into a manageable routine.
The Hidden Dangers of Neglecting Your Ice Machine’s Cleanliness
It is easy to assume that because ice machines constantly produce something frozen, they are immune to contamination. Unfortunately, that could not be further from the truth. Ice machines are warm, wet, and often dark environments, making them perfect breeding grounds for a variety of unpleasant microorganisms and mineral deposits. Ignoring regular cleaning is not just about aesthetics; it is a direct threat to health, operational efficiency, and your bottom line.
One of the most significant concerns is the build-up of bacteria, mold, and yeast. These microscopic invaders can thrive on the interior surfaces, leading to slimy residue and an unpleasant odor. When these contaminants become airborne or directly contact the ice, they can transfer to beverages and food, potentially causing illness in your customers or staff. This risk is amplified in healthcare settings, where vulnerable populations are more susceptible to foodborne pathogens.
Beyond health hazards, a dirty ice machine will inevitably perform poorly. Limescale and mineral deposits, common in areas with hard water, can accumulate on evaporator plates and water lines. This build-up acts as an insulator, forcing the machine to work harder to produce ice, leading to increased energy consumption and higher utility bills. It also reduces the machine’s overall ice production capacity, meaning you might not have enough ice during peak hours.
Furthermore, neglected components are prone to premature wear and tear. Clogged filters, scaled-up water pumps, and corroded parts can lead to costly breakdowns and necessitate expensive repairs or even early machine replacement. This unexpected financial burden, coupled with the potential loss of business due to unavailable ice, can significantly impact your operation’s profitability. A clean machine is a happy machine, and a happy machine is a reliable machine.
Common Contaminants to Watch Out For
- Mold and Slime: Often appearing as pink, black, or green residue, these grow in damp, dark conditions.
- Limescale and Mineral Deposits: White, chalky build-up, especially prevalent in hard water areas, affecting ice production and taste.
- Yeast: Can create a pinkish film, particularly in environments where sugary beverages are handled nearby.
- Bacteria: Invisible to the naked eye, but can cause foul odors and serious health risks.
Regular, thorough cleaning prevents these issues from taking root, ensuring that every cube of ice dispensed is clean, fresh, and safe. It is an investment in your business’s reputation and the well-being of everyone who consumes your ice.
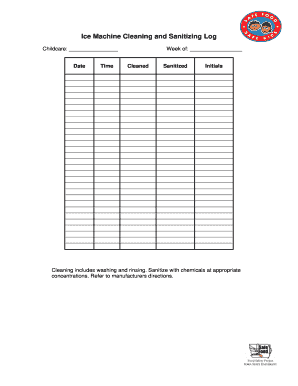
Your Step by Step Ice Machine Cleaning Checklist Template
Now that we understand just how important a clean ice machine is, let’s get practical. Having a comprehensive ice machine cleaning checklist template makes the cleaning process straightforward and ensures no critical step is missed. This template guides you through the necessary stages, from preparation to final sanitization, helping you maintain a hygienic and efficient ice production system.
Before you even think about grabbing a brush, safety is paramount. Always ensure the machine is powered off and unplugged. This prevents any accidental starts and protects you from electrical hazards. Next, make sure you have all your supplies ready: approved ice machine cleaner and sanitizer, brushes, cloths, gloves, and a bucket. Removing all the ice from the bin before you start is also a non-negotiable step.
The cleaning process itself can be broken down into distinct phases. First, you’ll tackle the interior components, which are the heart of your ice production. Then comes the critical sanitization step, followed by attention to the exterior and a final check. Consistency in following these steps will yield the best results and extend the lifespan of your equipment.
Here is a practical ice machine cleaning checklist template to guide you:
- Phase 1: Preparation and Safety First
- Turn off the machine and unplug it from the power source.
- Remove all ice from the storage bin and discard it.
- Gather all necessary cleaning supplies: gloves, safety glasses, ice machine cleaner, sanitizer (both EPA-approved), brushes (nylon, small detail brushes), clean cloths, and a bucket.
- Read the manufacturer’s manual for specific instructions for your machine model.
- Phase 2: Deep Cleaning the Interior Components
- Remove any removable components such as the water curtain, distribution tubes, and air filter (if applicable).
- Following manufacturer’s directions, use the ice machine cleaner to descale and clean evaporator plates and other internal surfaces. Apply generously and allow adequate dwell time.
- Scrub all internal surfaces, including the water trough, side walls, and bottom of the ice bin, to remove any slime, mold, or mineral deposits. Use appropriate brushes for hard-to-reach areas.
- Thoroughly rinse all cleaned surfaces with clean water until all traces of the cleaner are gone.
- Clean all removed components separately with the cleaner and rinse well.
- Phase 3: Sanitizing for Maximum Hygiene
- Prepare the EPA-approved ice machine sanitizer according to the manufacturer’s instructions.
- Apply the sanitizer to all internal surfaces and previously cleaned components. Ensure full coverage.
- Allow the sanitizer to sit for the recommended dwell time to effectively kill bacteria, mold, and yeast. Do not shorten this time.
- Rinse all surfaces and components thoroughly with clean, potable water. It is crucial to remove all sanitizer residue to prevent contamination of the ice and potential harm.
- Phase 4: Exterior and Final Touches
- Clean the machine’s exterior surfaces with a mild detergent and a clean cloth.
- Clean or replace the air filter on the condenser unit, if accessible, to ensure proper airflow and efficiency.
- Reassemble all internal components, ensuring they are correctly positioned.
- Plug the machine back in and turn it on.
- Run one or two batches of ice and discard them to flush out any remaining cleaning solution or residue from the system before serving ice.
- Record the cleaning date for future reference and scheduling.
Adhering to this structured approach, ideally on a monthly or bi-monthly basis depending on usage and water quality, will significantly enhance the safety and performance of your ice machine. Regular attention not only ensures a continuous supply of clean, fresh ice but also contributes to the longevity of your valuable equipment. It is a small effort for a significant return in hygiene and operational efficiency.


