Embarking on a new tenancy can be an exciting time for both landlords and tenants. For landlords, it represents a new opportunity, while for tenants, it’s the beginning of a new chapter in a new home. However, navigating the initial stages of a rental agreement, particularly the move-in process, can sometimes be a little tricky without proper preparation. Ensuring a smooth transition is key to fostering a positive relationship from day one.
This is precisely where a well-structured system comes into play. Imagine having a clear, itemized guide that covers every corner of your property before a tenant even unpacks their first box. Such a tool not only streamlines the handover but also sets clear expectations for both parties. A comprehensive landlord move in checklist template is not just a piece of paper; it is an essential foundation for a transparent and mutually respectful tenancy, safeguarding your investment and the tenant’s peace of mind.
Beyond Just Keys: Why a Detailed Move-In Checklist is Your Best Friend
The move-in checklist is more than a simple formality; it is a critical document that protects your property and establishes transparency between you and your new tenant. Its primary purpose is to meticulously document the condition of the rental unit at the moment of occupancy. This detailed record serves as an unbiased baseline, becoming invaluable should any disputes arise regarding damages when the tenant eventually moves out. Without it, determining who is responsible for what can quickly become a he-said, she-said scenario, often leading to frustrations and potential financial losses.
Consider the security deposit, for instance. This deposit is intended to cover any damages beyond normal wear and tear. But how do you objectively define “normal wear and tear” or prove a new scratch wasn’t there before? This is where your checklist shines. By detailing every existing scuff, dent, or appliance issue before move-in, you create an irrefutable record. Both parties sign off on this document, acknowledging the property’s state, which vastly simplifies the process of assessing deductions from the security deposit later on, making it a fair and accountable process for everyone involved.
Beyond dispute prevention, a thorough checklist also offers practical organizational benefits for you as a landlord. It ensures you haven’t overlooked any maintenance issues that should be addressed before the tenant arrives, presenting the property in its best possible light. This professional approach can significantly enhance your reputation and tenant satisfaction. It shows you are organized, detail-oriented, and committed to providing a well-maintained living space, which in turn attracts and retains good tenants.
Key Areas to Inspect Before Handover
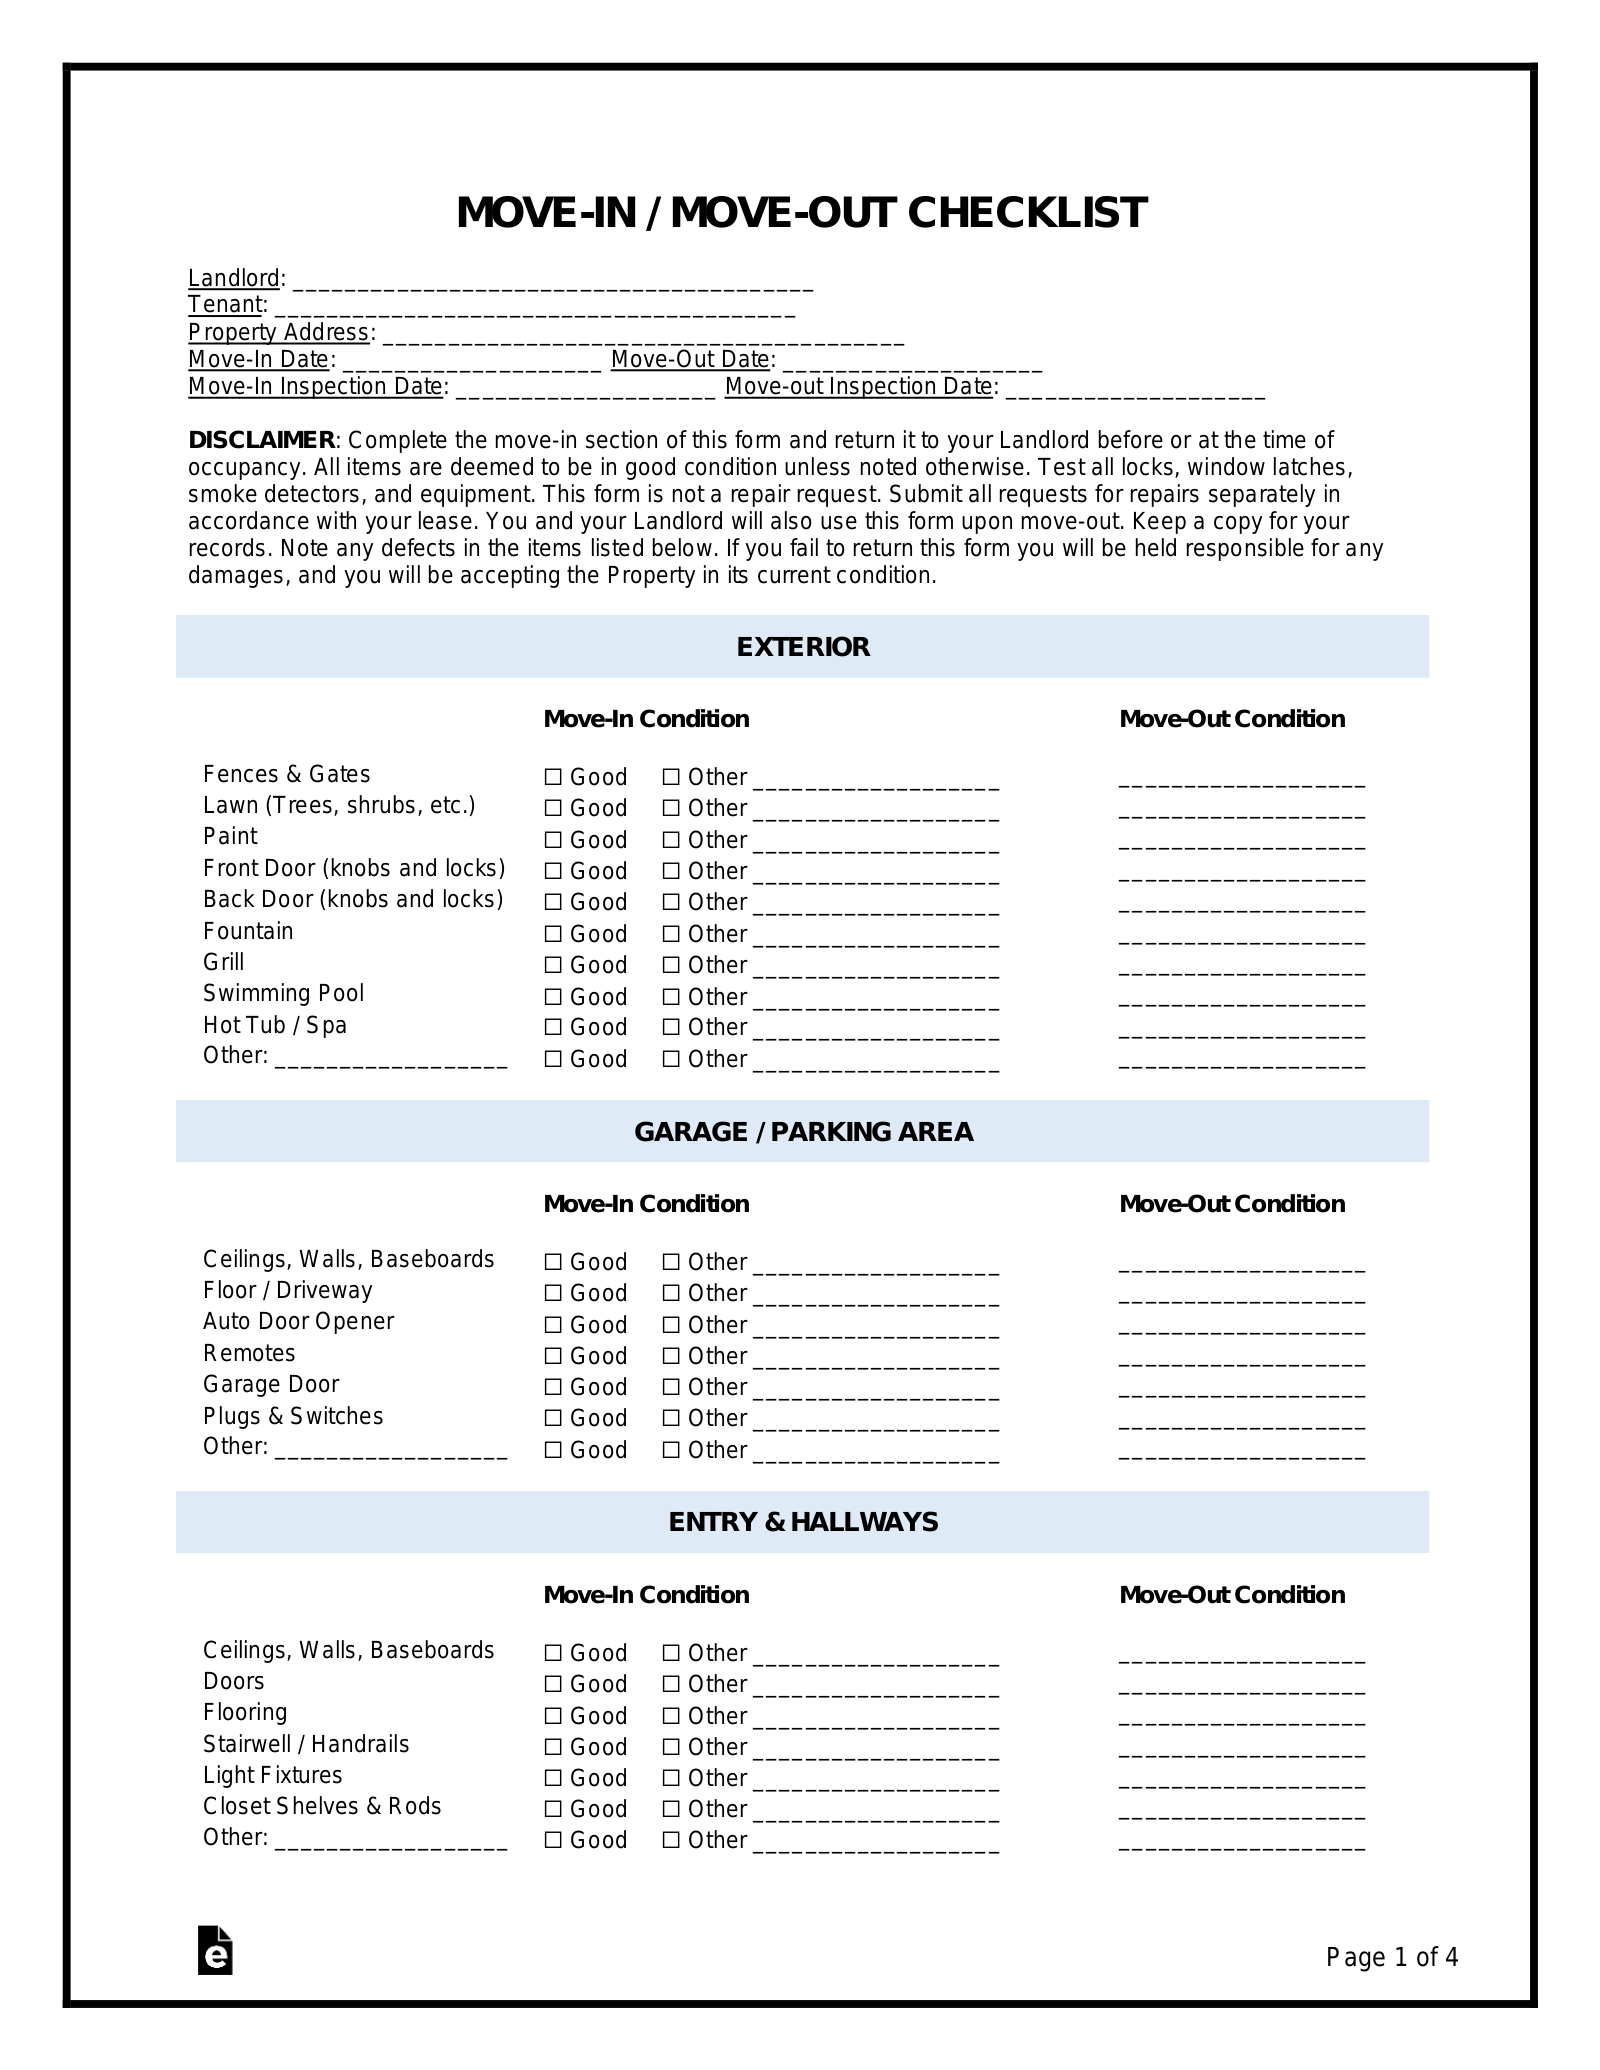
When you’re preparing your landlord move in checklist template, think broadly, covering both the exterior and interior common elements if applicable to your property type. Neglecting these areas can lead to misunderstandings or unnoticed damage.
- Exterior: This includes the general condition of the building’s siding, roof, gutters, pathways, driveway, and any fencing. Note the landscaping, presence of any debris, or significant cracks in concrete.
- Common Areas (if applicable): For multi-unit dwellings, inspect shared hallways, stairwells, lobbies, laundry rooms, and other amenities. Document the condition of walls, flooring, lighting, and any shared appliances.
Inside the Dwelling: Room by Room
Once inside the unit, a systematic room-by-room approach is essential. Be exhaustive, checking every surface and fixture. Don’t just glance; inspect thoroughly.
- Kitchen: Check all appliances (refrigerator, stove, oven, dishwasher, microwave) for cleanliness and functionality. Inspect countertops for scratches or burns, cabinets for damage, and the sink for leaks or clogs. Note the condition of the floor and walls.
- Bathrooms: Examine the toilet, sink, and shower/tub for cleanliness, cracks, leaks, and proper function. Look at tiles, grout, and any fixtures like towel bars or mirrors. Ensure ventilation fans work.
- Bedrooms and Living Areas: Document the condition of walls (paint, nail holes, scuffs), ceilings, and flooring (carpeting, hardwood, tile). Check windows for cracks, proper sealing, and functioning locks. Test all light fixtures, ceiling fans, and ensure doors open and close smoothly with working locks.
- Utilities and Safety: Note the location and condition of smoke detectors, carbon monoxide detectors, and fire extinguishers. Check all outlets and switches.
Beyond simply listing items, assign a condition rating (e.g., excellent, good, fair, poor) and take clear, timestamped photographs or even a video walkthrough. These visual aids complement your written descriptions, providing undeniable proof of the property’s state.
Making the Checklist Work for You: Tips for Implementation
Creating a comprehensive move-in checklist is only half the battle; effectively implementing it is crucial for maximizing its benefits. The ideal scenario involves completing the checklist with your new tenant present, ideally before they begin moving in their belongings. This joint inspection fosters an atmosphere of trust and collaboration, allowing both parties to agree on the property’s condition before the tenancy officially commences. It also gives the tenant an immediate opportunity to point out anything they might notice that you’ve missed, ensuring a truly collaborative assessment.
During this walkthrough, encourage the tenant to actively participate. Give them the opportunity to add their own comments or observations directly onto the checklist. Once completed, both you and the tenant should sign and date the document, acknowledging that you’ve both reviewed and agreed upon the recorded condition of the property. This signature is vital for establishing the legal validity of the document, making it a binding agreement on the property’s initial state.
It’s equally important to make sure both parties retain a copy of the fully signed checklist. A physical copy is excellent, but also consider having a digital version, perhaps a scanned PDF, stored securely in your tenant management system or cloud storage. This ensures easy access and safeguards against loss. Having this document readily available for both landlord and tenant eliminates future confusion and serves as a quick reference throughout the tenancy.
Think of this initial landlord move in checklist template not just as a move-in tool, but as the first step in your move-out process as well. When the tenancy concludes, you will use this exact same checklist as a comparative tool. By re-inspecting the property against the documented initial condition, you can accurately identify any new damages that have occurred beyond normal wear and tear. This systematic approach streamlines the move-out inspection, ensuring fairness in security deposit returns and maintaining a positive final interaction with your departing tenant.
- Joint Inspection is Best: Always try to complete the checklist with the tenant present.
- Encourage Tenant Input: Allow them to add notes and observations.
- Sign and Date: Ensure both parties sign and date the completed document.
- Keep Secure Copies: Provide both landlord and tenant with a copy, and consider digital backups.
- Use for Move-Out: This initial checklist is your reference for the final inspection.
By diligently using a detailed move-in checklist, you are laying a strong foundation for a harmonious and professional landlord-tenant relationship. It minimizes misunderstandings from the outset, offers clear guidelines for property maintenance, and provides an impartial reference point should any issues arise during or at the end of the lease term. This proactive approach safeguards your investment and promotes an environment of trust and mutual respect.
Implementing such a straightforward yet powerful tool significantly reduces potential stress and administrative burdens, allowing you to focus on managing your property effectively and fostering positive tenant experiences. It’s an investment in clear communication and responsible property management that pays dividends throughout the entire rental lifecycle, ensuring a smoother journey for everyone involved.


