Moving into a new rental property or preparing for a tenant to move out can be an exciting yet incredibly detailed process. To ensure a smooth transition and avoid potential disagreements down the line, one of the most vital tools at your disposal is a comprehensive tenant walk through checklist template. This document serves as a critical record of the property’s condition, protecting both landlords and tenants from misunderstandings regarding damages or cleanliness. It’s not just a formality; it’s a foundation for a fair and transparent tenancy.
Imagine a scenario where a tenant moves out, and suddenly there’s a dispute over a scratch on the hardwood floor or a stain on the carpet. Without clear, documented evidence of the property’s state at the beginning and end of the lease, resolving such issues can quickly become stressful and costly for all parties involved. A well-executed walk-through with a detailed checklist eliminates much of this ambiguity, fostering trust and clarity.
This article will guide you through the importance of a thorough walk-through process and help you understand what essential elements should be included in your very own checklist. By the end, you’ll be equipped to create and utilize a document that safeguards everyone’s interests, making the rental experience much more predictable and professional.
Why Every Landlord and Tenant Needs a Thorough Walk-Through
The walk-through inspection, both at the beginning and end of a tenancy, is far more than just a quick look around. It’s a fundamental step that establishes a baseline for the property’s condition and sets expectations for its maintenance. For landlords, this process is about protecting their significant investment. Documenting the pre-existing condition of appliances, fixtures, walls, and flooring helps ensure that any damage beyond normal wear and tear can be accurately attributed and addressed. It’s their assurance that the property will be returned in a similar state to when it was first handed over.
On the other hand, tenants benefit immensely from this process as well. Their security deposit, often a significant sum, is at stake. By participating in a detailed walk-through at move-in and carefully noting any existing defects or issues, they create a record that proves they are not responsible for problems they didn’t cause. This documentation is their shield against unwarranted deductions from their deposit when they eventually move out.
Without this crucial step, both parties are essentially operating on good faith alone, which can quickly erode when minor discrepancies arise. A joint inspection cultivates an atmosphere of transparency and mutual respect, laying the groundwork for a positive landlord-tenant relationship from the outset. It removes guesswork and replaces it with concrete evidence, which is invaluable if disagreements ever need to be formally resolved.
The Move-In Walk-Through
This initial inspection sets the benchmark. Landlords should provide the tenant with a blank checklist and walk through the property together, noting the condition of every item and area. It’s crucial to be meticulous, even recording minor imperfections. Both parties should sign and date the completed checklist, and each should retain a copy.
The Move-Out Walk-Through
The move-out inspection serves to compare the property’s condition against the initial move-in checklist. This is where the initial documentation truly shines. Any new damage (beyond normal wear and tear) can be identified by comparing it to the move-in record. Again, both parties should ideally be present, go through the checklist item by item, and sign the final document.
Beyond the checklist itself, supplementing the inspection with photographic or video evidence is highly recommended. Dated photos and videos provide irrefutable visual proof of the property’s condition, backing up every entry on your written form. This multi-layered documentation strategy makes any future claim or dispute much easier to navigate, often preventing them entirely.
Key Areas to Include in Your Checklist
To be truly effective, a tenant walk through checklist template needs to be comprehensive, covering every square inch of the rental unit. Thinking systematically about each room and its components will help you build an exhaustive list that leaves no stone unturned. A good checklist doesn’t just ask if something is "good" or "bad"; it prompts detailed descriptions of condition, cleanliness, and functionality.
When you’re crafting your own checklist, categorize areas to make the inspection process logical and efficient. This ensures that you move from one section to the next without forgetting crucial elements. From the moment you step onto the property to the final flick of a light switch, every detail matters.
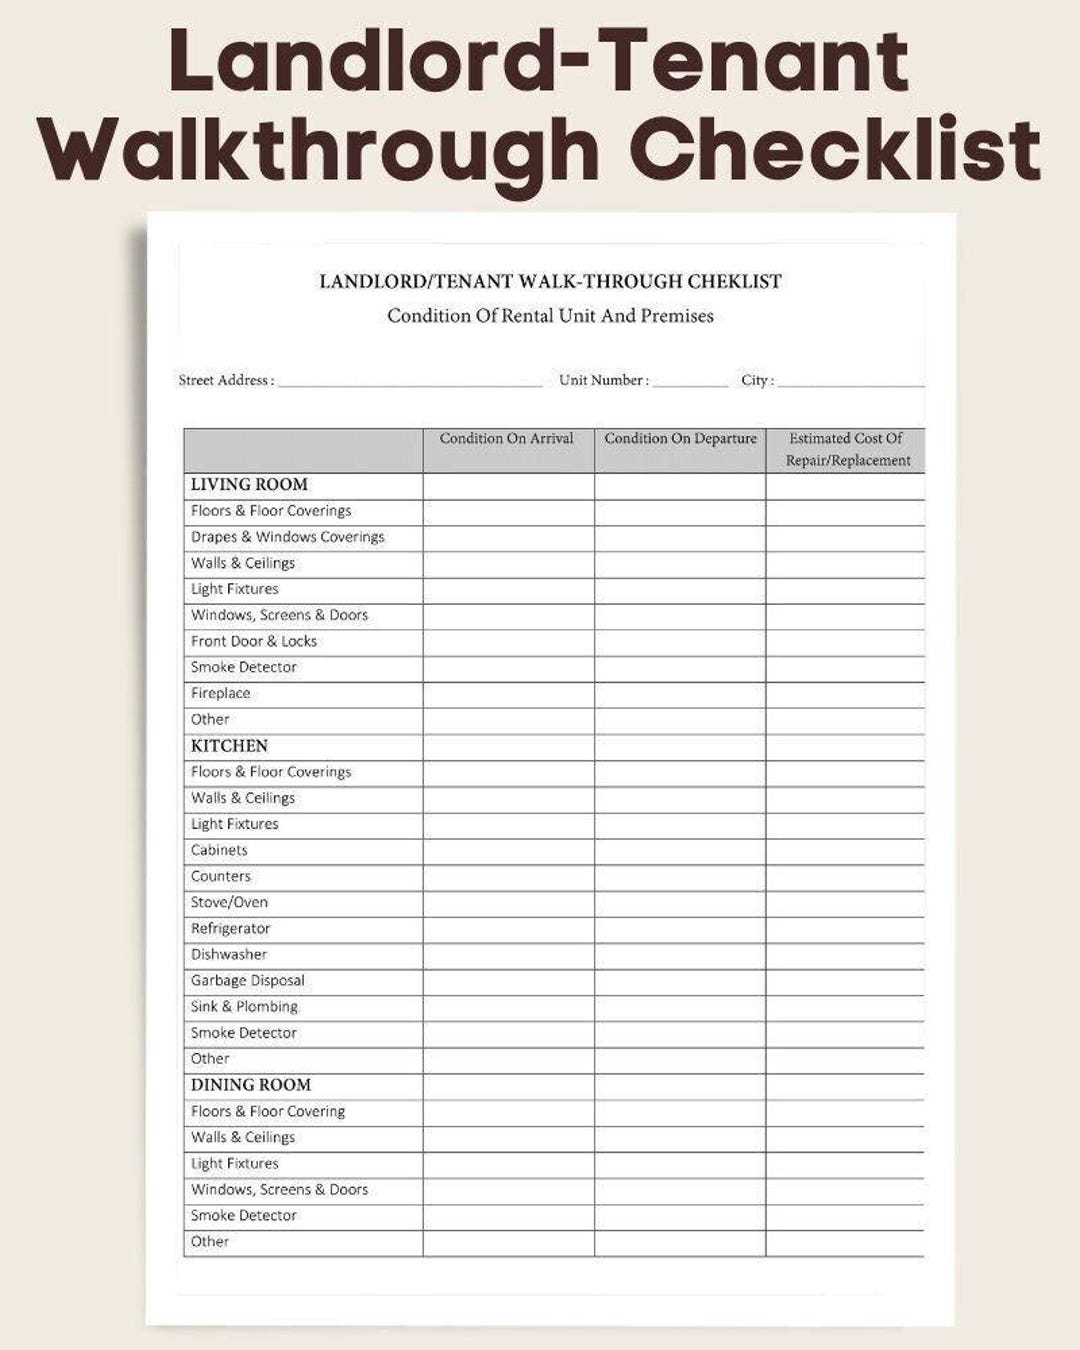
Here’s a breakdown of essential areas to include in your tenant walk through checklist template:
- Exterior:
- Yard/Landscaping condition
- Sidewalks and driveways (cracks, stains)
- Entry doors (scratches, dings, lock functionality)
- Windows (cracks, screens, frame condition)
- Mailbox condition
- Garage/Parking area (door function, cleanliness)
- Living Room/Dining Room/Hallways:
- Walls (paint condition, holes, scuffs)
- Flooring (carpet stains, hardwood scratches, tile chips)
- Ceilings (water stains, cracks)
- Light fixtures (working condition, missing covers)
- Windows and blinds/curtains (cleanliness, damage)
- Electrical outlets and switches (working condition)
- Smoke detectors (tested, present)
- Kitchen:
- Appliances (refrigerator, stove, dishwasher, microwave – cleanliness, scratches, working order)
- Countertops (scratches, burns, stains)
- Cabinets and drawers (cleanliness, damage, functionality)
- Sink and faucet (leaks, rust, working order)
- Flooring
- Light fixtures
- Bedrooms:
- Walls, flooring, ceilings
- Closets (doors, rods, shelves)
- Windows and blinds/curtains
- Light fixtures and outlets
- Bathrooms:
- Toilet (cleanliness, flush functionality)
- Sink and faucet (cleanliness, leaks, working order)
- Shower/Bathtub (cleanliness, mildew, tile condition, water pressure)
- Vanity and cabinets
- Flooring
- Exhaust fan (working condition)
- Utilities/Miscellaneous:
- Water heater (leaks, age)
- HVAC system (filter condition, thermostat functionality)
- Laundry facilities (washer, dryer – cleanliness, working order)
- Carbon monoxide detectors (present, tested)
Each item on your list should have a space to describe the condition (e.g., "new," "good," "fair," "damaged"), add specific notes, and check a box for presence or functionality. This granular approach ensures nothing is overlooked and provides a clear, actionable record.
Implementing a meticulous walk-through inspection with a well-designed checklist is more than just a bureaucratic task; it’s an essential strategy for fostering clear communication and protecting the interests of both landlords and tenants. By taking the time to document the property’s condition thoroughly at both move-in and move-out, you set the stage for a professional relationship built on transparency and mutual understanding. This proactive approach significantly reduces the likelihood of disagreements over property damage, making the entire rental experience smoother and more equitable for everyone involved.
Ultimately, investing effort in creating and consistently using a detailed inspection process ensures that all parties can focus on the positive aspects of renting, rather than worrying about potential disputes. It provides peace of mind, knowing that expectations are clear and accountability is established. Embrace this practice, and you’ll find that managing rental properties becomes a far less stressful and much more rewarding endeavor.


