Navigating the complexities of property ownership, acquisition, or even just routine maintenance can feel like a daunting task. Whether you’re an investor eyeing a potential purchase, a property manager overseeing a portfolio, or a business owner looking to optimize your facilities, understanding the true condition of a building is paramount. It’s not just about what you see on the surface; it’s about delving deeper into the structural integrity, mechanical systems, and overall health of the asset.
This thorough evaluation, known as a Property Condition Assessment (PCA), provides invaluable insights, helping you make informed decisions, mitigate risks, and plan for future expenditures. But how do you ensure every crucial element is considered, every system scrutinized, and no vital detail is overlooked? The answer often lies in having a systematic, reliable tool at your fingertips, one that guides you through the process step-by-step.
What Exactly Goes Into a Property Condition Assessment (PCA)?
A Property Condition Assessment, or PCA, is essentially a due diligence report that details the physical condition of a commercial property. Think of it as a comprehensive health check-up for a building. Its primary purpose is to identify existing deficiencies, potential capital expenditure needs, and provide an overview of the property’s overall condition. These assessments are critical for various stakeholders, including prospective buyers, lenders, property investors, and even current owners looking to plan for future maintenance and capital improvements.
The scope of a PCA is quite broad, typically involving a visual walk-through survey of the property, interviews with occupants or maintenance personnel, and a review of relevant documents such as construction plans, permits, and maintenance records. The resulting report, often called a Property Condition Report (PCR), compiles all findings, providing a detailed narrative of the building’s current state, along with recommendations for repairs, estimated costs, and a timeline for necessary capital expenditures over a projected period, usually 5 to 10 years.
For anyone involved in commercial real estate, understanding the components of a PCA is non-negotiable. It’s the foundation upon which strategic decisions are built, helping to prevent unexpected financial burdens down the line. A properly executed PCA sheds light on everything from the roof to the foundation, ensuring that you have a clear picture of what you’re investing in or managing. This level of detail empowers you to negotiate better deals, allocate budgets wisely, and maintain the long-term value of the property.
Key Areas Covered in a PCA
- Site and Exterior Elements: This includes parking lots, walkways, landscaping, drainage, exterior walls, windows, and doors.
- Structural Frame and Building Envelope: Focuses on the building’s foundation, load-bearing walls, roof structure, and overall integrity against weather and time.
- Mechanical, Electrical, and Plumbing (MEP) Systems: Examines the heating, ventilation, air conditioning (HVAC) systems, electrical distribution, lighting, and plumbing fixtures and piping.
- Interior Finishes and Life Safety Systems: Covers interior walls, flooring, ceilings, fire protection systems, emergency lighting, and egress routes.
- Accessibility and Environmental Concerns: Assesses compliance with ADA (Americans with Disabilities Act) and identifies potential environmental hazards like asbestos, lead paint, or mold, often requiring specialized environmental assessments.
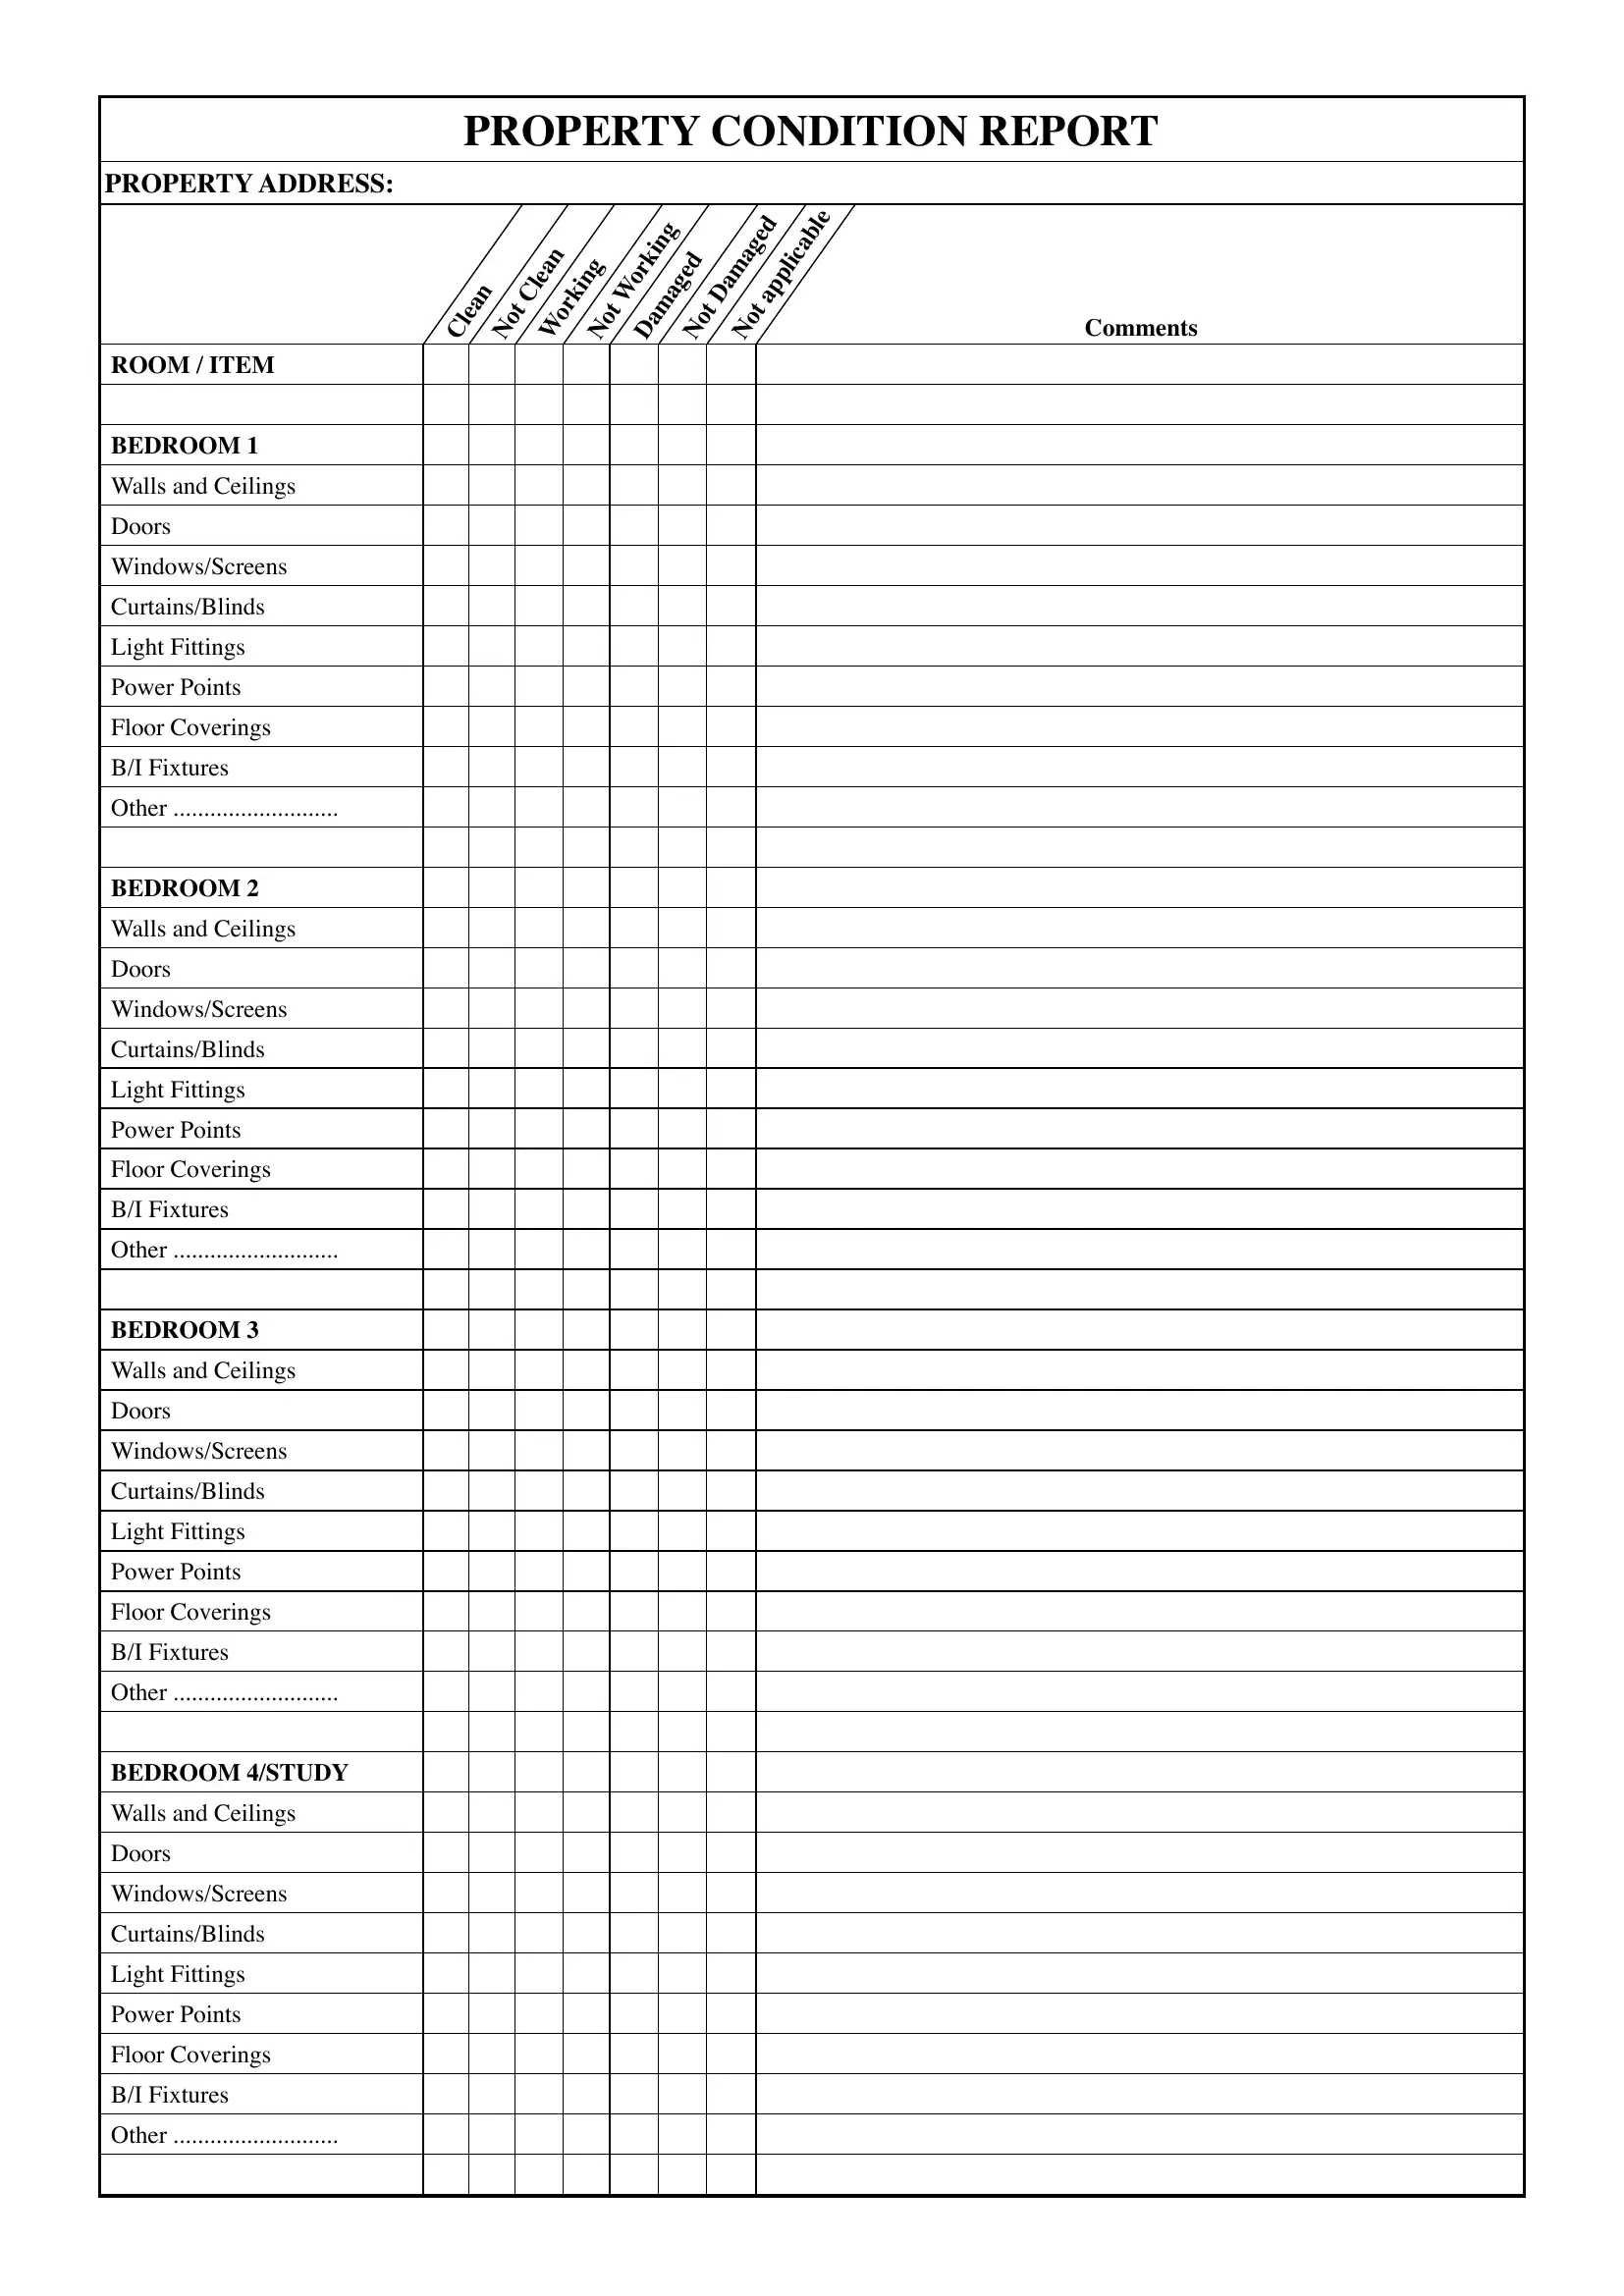
To ensure such a comprehensive review is conducted consistently and accurately, a structured approach is absolutely essential. This is where the power of a well-designed property condition assessment checklist template truly shines. It acts as a roadmap, guiding the inspector through each system and component, ensuring that no stone is left unturned and all critical data points are systematically recorded. Utilizing a robust property condition assessment checklist template helps standardize the assessment process, making it more efficient and reliable across different properties and inspectors.
Building Your Own Robust Property Condition Assessment Checklist Template
Creating your own property condition assessment checklist template can be incredibly beneficial, offering a tailored approach that fits your specific needs and the types of properties you frequently deal with. While generic templates are a good starting point, customizing one allows you to emphasize aspects that are most critical to your investment strategy or management responsibilities. Think about the unique characteristics of the properties in your portfolio – are they historical buildings, industrial warehouses, retail spaces, or multifamily residential? Each type will have slightly different priorities and common issues.
The goal is to design a template that is not just a list of items, but a practical tool that facilitates a thorough and efficient inspection. It should be intuitive enough for anyone with a basic understanding of property systems to follow, yet detailed enough to capture nuanced observations. A well-structured template minimizes the risk of human error, ensures consistency in reporting, and ultimately saves time and resources by streamlining the data collection process during a physical assessment.
When developing your checklist, consider breaking it down into logical sections that mirror the typical flow of an inspection or the key systems of a building. This makes the process more manageable and ensures a systematic approach. Don’t forget to include spaces for notes, photographs, and severity ratings for each identified issue. This documentation is crucial for the final report and for substantiating any recommendations or cost estimates.
Here are some essential elements to include in your property condition assessment checklist template:
- Categorize by System: Break down the property into logical sections like roofing, HVAC, electrical, plumbing, site, interior finishes, etc.
- Detailed Inspection Points: Instead of just “Roof,” specify “Roof membrane condition,” “Flashing integrity,” “Drainage effectiveness,” and “Parapet walls.”
- Rating System: Incorporate a simple rating (e.g., Good, Fair, Poor, N/A) for each item to quickly summarize its condition.
- Space for Notes and Recommendations: Crucial for adding specific observations, detailing the nature of the defect, and suggesting immediate or long-term actions.
- Date and Inspector Information: Essential for record-keeping, accountability, and tracking when the assessment was performed and by whom.
- Action Item Section: A dedicated space to list immediate and long-term actions required, with estimated costs and priority levels.
Regularly reviewing and refining your property condition assessment checklist template based on real-world experience will further enhance its effectiveness. Each assessment you conduct will likely reveal new insights or areas where your template could be improved. This iterative process ensures that your template remains a dynamic and invaluable asset in your property management toolkit, helping you to proactively manage properties and make truly informed decisions.
Embracing a systematic approach to property evaluation, supported by a robust checklist, transforms what could be an overwhelming task into a manageable and insightful process. It’s about empowering yourself with the knowledge needed to make sound financial decisions, maintain the value of your assets, and ensure the safety and functionality of any property under your care. By investing time in developing and utilizing such a tool, you’re not just conducting an assessment; you’re building a foundation for long-term success and proactive property stewardship.


