Utilizing such a resource streamlines the design process, minimizes costly mistakes, and improves the overall quality of finished apparel. It allows designers to visualize the final product accurately and communicate placement instructions clearly to printers or production teams. This leads to greater efficiency, reduces revisions, and ultimately contributes to customer satisfaction with a well-placed, visually appealing design.
This article will further explore various aspects of apparel design and production, including different printing techniques, design considerations for various apparel types, and best practices for creating effective and visually appealing designs.
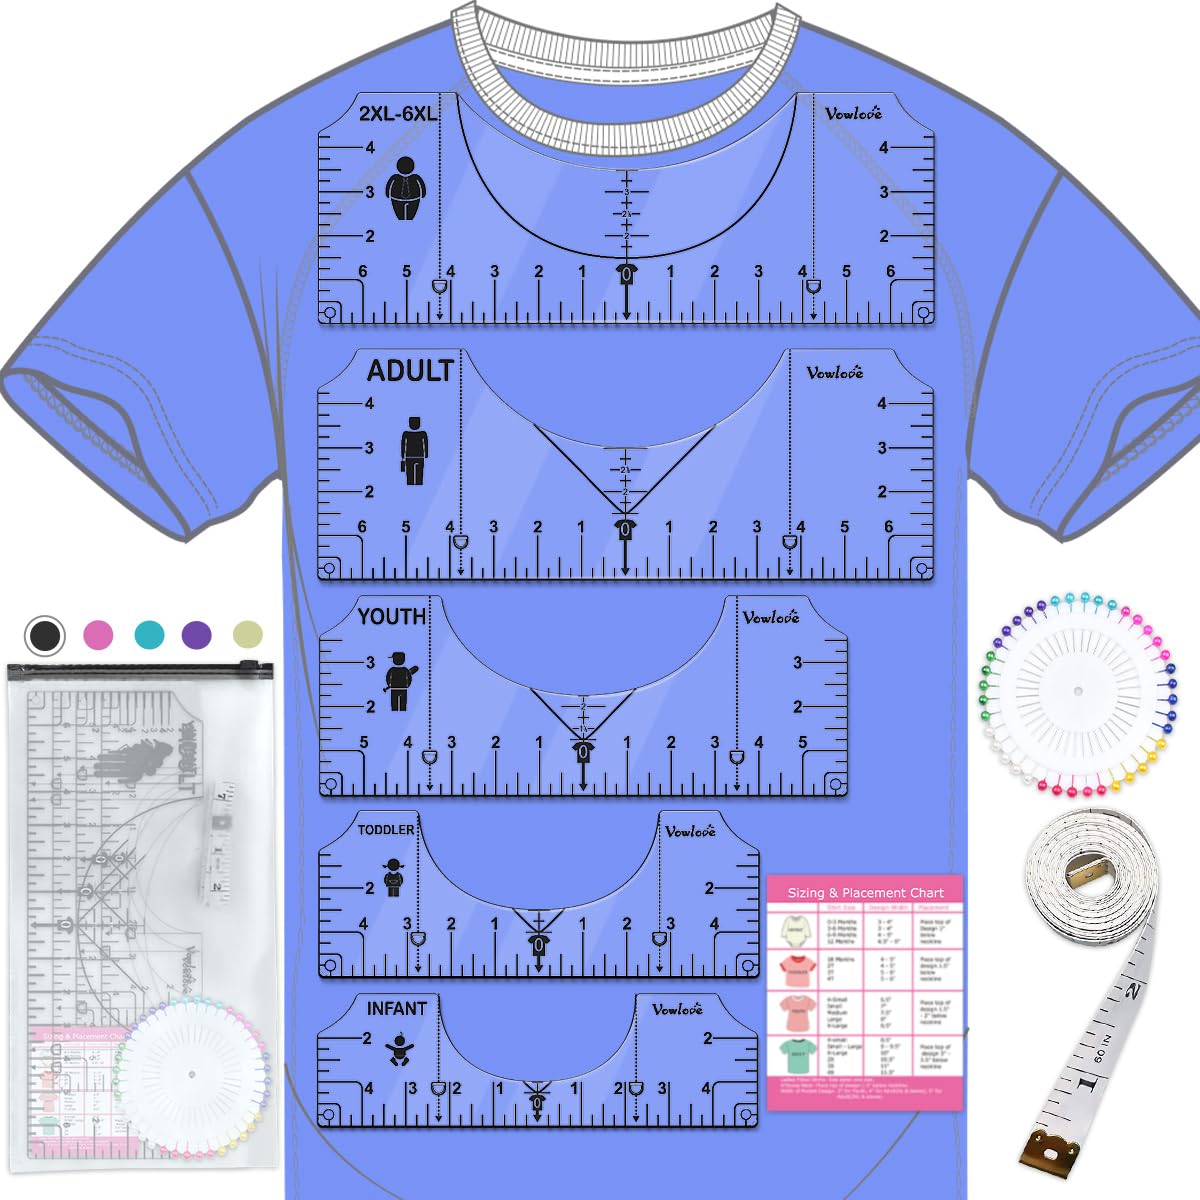
Key Components of a Shirt Placement Guide
Effective guides incorporate several crucial elements to ensure accurate and consistent design placement.
1: Outline of the Garment: A clear visual representation of the shirt’s shape, including front, back, and sometimes sleeve views, forms the foundation of the guide.
2: Sizing Variations: Templates often offer outlines for multiple sizes (S, M, L, XL, etc.) to accommodate design adjustments for different garment dimensions.
3: Print Area Dimensions: Precise measurements define the maximum printable area on each garment section, preventing design elements from being truncated or falling off the edges.
4: Safe Zones: These designated areas within the printable area ensure critical design elements remain visible and avoid being obscured by seams, collars, or other garment features.
5: Center Lines and Alignment Marks: These markings facilitate precise centering and symmetrical placement of design elements.
6: Measurement Units: Clear indication of units (inches or centimeters) ensures accurate scaling and avoids confusion during production.
7: Fabric Considerations: Some guides may include notes regarding fabric type (e.g., cotton, polyester) to account for potential shrinkage or printing limitations.
These components work together to provide a comprehensive framework for design placement, ensuring predictable and professional results across various garment sizes and styles. This meticulous approach contributes to a higher quality finished product and minimizes production errors.
How to Create a Shirt Placement Guide Template
Creating a precise placement guide requires careful consideration of garment dimensions, printing methods, and design specifications. The following steps outline the process.
1: Select the Garment Type: Specify the type of shirt (t-shirt, polo, hoodie, etc.) for the template. Different garments have varying shapes and seam placements, affecting design placement.
2: Obtain Accurate Measurements: Gather precise measurements for each size variation of the chosen garment. This includes width, length, sleeve length (if applicable), and neck opening dimensions.
3: Create a Visual Representation: Use design software (e.g., Adobe Illustrator, CorelDRAW) to create an outline of the garment based on the gathered measurements. Include front, back, and sleeve views as needed.
4: Define the Printable Area: Mark the maximum print area on each garment section, considering limitations imposed by printing equipment and garment construction.
5: Establish Safe Zones: Indicate safe zones within the printable area to ensure key design elements avoid seams, collars, or other obstructions.
6: Add Alignment Marks: Incorporate center lines and other alignment marks to facilitate symmetrical and precise design placement.
7: Specify Measurement Units: Clearly indicate the units of measurement (inches or centimeters) used in the template.
8: Include Fabric Considerations: If applicable, add notes regarding fabric type and potential shrinkage to guide design choices and printing parameters.
A comprehensive template ensures design consistency across various sizes and streamlines the production process, minimizing errors and maximizing the visual impact of the final product. Precise measurements and clearly defined safe zones are essential for achieving professional results.
Precise and effective apparel design relies heavily on accurate placement guides. These templates provide a crucial framework for designers and production teams, ensuring consistent and visually appealing results across various garment sizes and styles. From outlining printable areas and safe zones to incorporating alignment marks and garment-specific measurements, a well-crafted template minimizes production errors, streamlines workflows, and ultimately contributes to a higher quality finished product.
Successful apparel design hinges on the synergy between creative vision and technical precision. Adopting standardized placement guides represents a commitment to quality and professionalism, elevating brand perception and customer satisfaction. As apparel printing technologies continue to evolve, the importance of accurate and adaptable templates will remain paramount in achieving optimal design execution.

