Utilizing such a framework offers significant advantages. It aids in developing muscle memory and improving letter consistency, crucial for creating polished, professional-looking calligraphy. These tools simplify the learning process by breaking down complex letterforms into manageable steps. Furthermore, they can inspire creativity by providing a starting point for exploring different lettering styles and compositions. By offering consistent practice, such resources empower users to progress efficiently toward mastery of calligraphic techniques.
This foundation in understanding structured lettering practice facilitates exploration of specific techniques, tools, and resources for effective calligraphy. Topics such as pen control, ink selection, paper types, and the nuances of various lettering styles become more accessible and manageable with a solid understanding of fundamental guidelines and their application.
Key Components of a Lettering Guide
Effective lettering guides incorporate several crucial elements to facilitate skill development and consistent results.
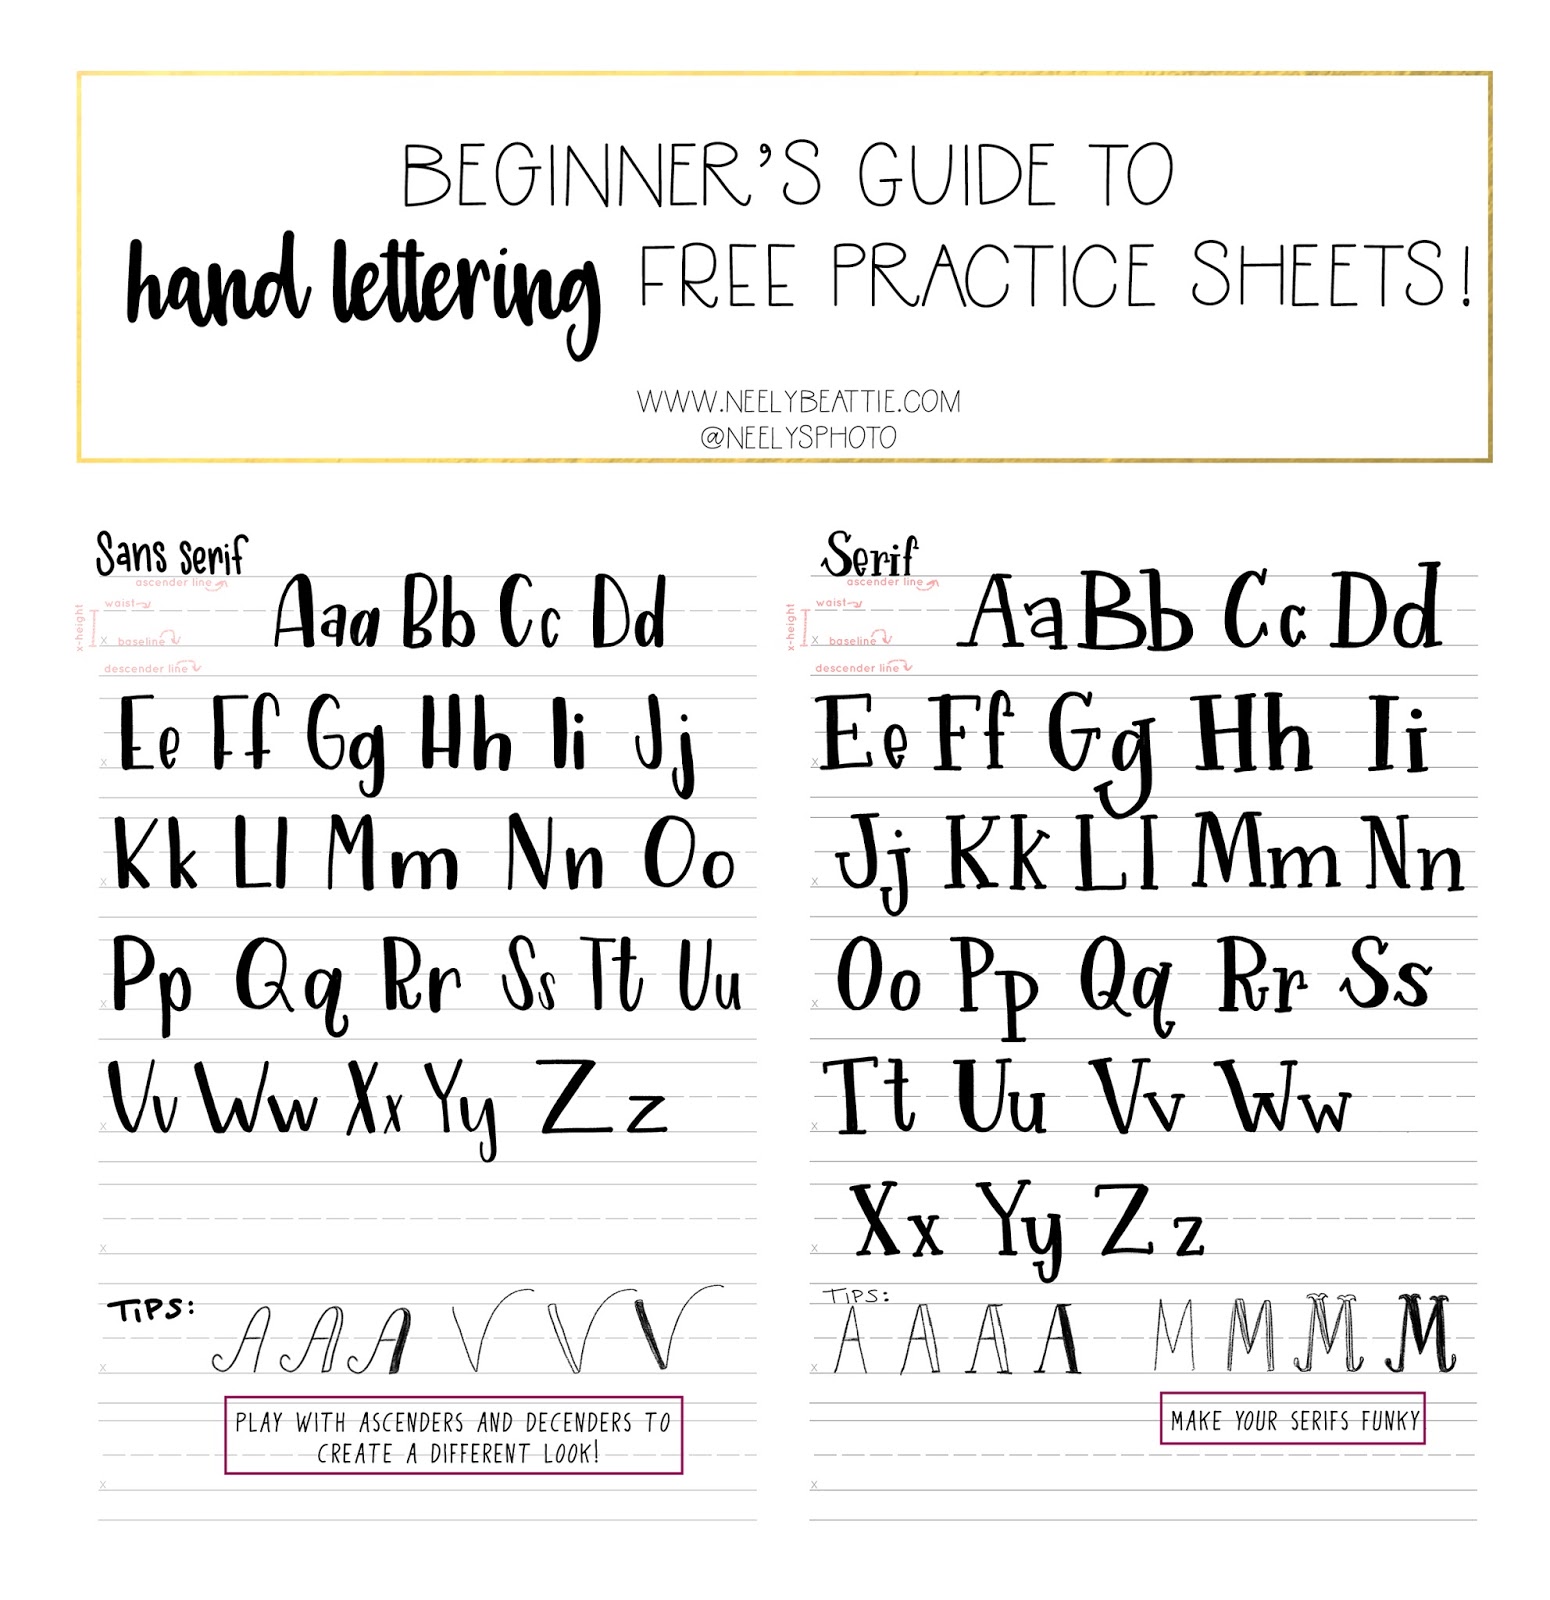
1: Baseline: A horizontal line defining the base of lowercase letters, ensuring consistent letter placement and overall visual harmony.
2: X-height: The height of lowercase letters (excluding ascenders and descenders), typically measured from the baseline to the top of the lowercase ‘x’. This establishes letter proportions within a given style.
3: Ascender Line: A horizontal line indicating the top of ascending lowercase letters (like ‘h’ or ‘l’), ensuring consistent height for these letter parts.
4: Descender Line: A horizontal line marking the bottom of descending lowercase letters (like ‘g’ or ‘y’), ensuring consistent depth for these letter parts.
5: Slant Lines: Angled lines providing a visual guide for consistent letter slant and overall uniformity in italic or slanted scripts.
6: Character Boxes or Outlines: Pre-drawn boxes or outlines depicting individual letter shapes, offering a framework for practicing letter formation and spacing.
7: Flourish and Embellishment Guides: Optional elements providing guidance for incorporating decorative flourishes and embellishments into letterforms, enhancing aesthetic appeal.
These structural elements work in concert to provide a practical roadmap for learning and refining lettering skills, contributing to improved letter consistency, form, and overall compositional harmony.
How to Create a Hand Lettering Guide Template
Creating a personalized template provides a tailored framework for practicing and refining specific lettering styles. This process allows for customization based on individual needs and preferences, leading to more effective skill development.
1: Define the Scope: Determine the specific lettering style (e.g., sans-serif, italic, script) and character set (uppercase, lowercase, numerals, symbols) for the guide. This clarifies the template’s purpose and parameters.
2: Establish Baseline and X-height: Draw a horizontal baseline and determine the desired x-height, marking this measurement above the baseline. These elements serve as foundational guidelines for letter proportions.
3: Determine Ascender and Descender Heights: Mark the ascender and descender lines above and below the baseline, respectively. The heights of these lines depend on the chosen lettering style and desired letter proportions.
4: Add Slant Guides (Optional): For slanted styles like italics, draw angled lines to indicate the desired slant. This ensures consistent letter angles throughout the practice.
5: Create Character Outlines or Boxes: Lightly sketch or draw outlines of individual letters within the established guidelines. These serve as templates for practicing letter formation and spacing.
6: Incorporate Flourish Guides (Optional): For decorative scripts, lightly sketch guides for flourishes and embellishments. These guides add visual interest and refine stylistic details.
7: Digitize (Optional): Scan or recreate the hand-drawn template digitally using vector graphics software. This allows for easy reproduction, scaling, and customization.
8: Test and Refine: Use the template for practice, observing letter consistency and overall aesthetic appeal. Adjust guidelines as needed for optimal results and desired stylistic nuances.
A well-designed template serves as a valuable tool for refining lettering skills and maintaining consistency across various projects. Methodical construction ensures the template caters to specific stylistic goals and facilitates progressive improvement in letterforms and overall compositional balance.
Mastery of hand lettering requires diligent practice and a structured approach. Templates provide a crucial framework for developing consistent letterforms, refining stylistic nuances, and accelerating skill development. Understanding the core components of these guidesbaseline, x-height, ascender/descender lines, and slant guidesempowers practitioners to create or utilize templates effectively. Whether pre-designed or personally crafted, these tools offer a pathway to improved accuracy, consistency, and creative exploration within the art of hand lettering.
The ability to produce polished, professional-looking hand lettering expands creative possibilities across various applications, from personalized stationery and artistic projects to branding and design work. Embracing structured practice through the use of templates offers a tangible advantage in achieving lettering mastery and unlocking the full potential of this expressive art form.
